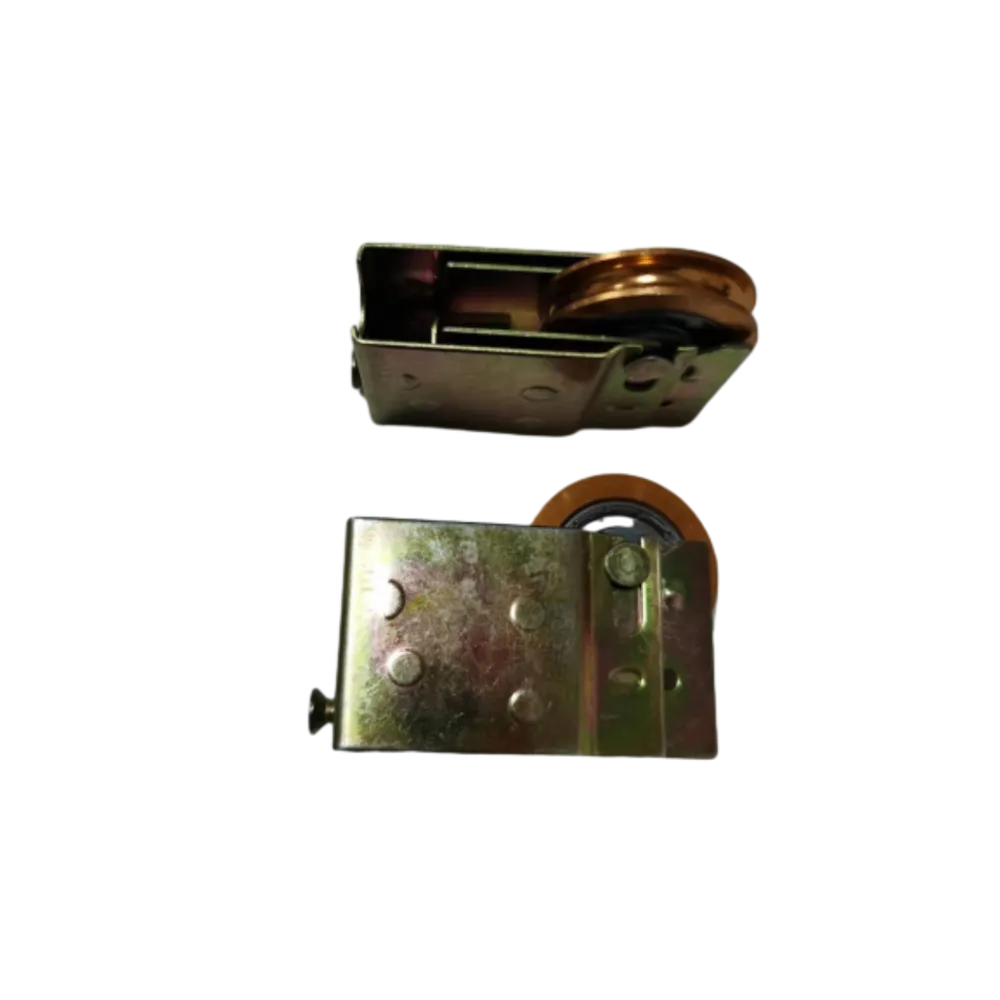
wheel replacement for sliding screen door
Wheel Replacement for Sliding Screen Doors A Comprehensive Guide
Sliding screen doors are a wonderful addition to any home, providing easy access to outdoor spaces while allowing fresh air to circulate. However, over time, the wheels of these doors can wear out, making them difficult to open and close. If you find yourself struggling with a sticky or non-functioning sliding screen door, it may be time to consider replacing the wheels. In this guide, we’ll walk you through the steps involved in replacing the wheels of your sliding screen door, ensuring that it operates smoothly once again.
Understanding the Function of the Wheels
The wheels are a critical component of sliding screen doors. They are designed to help the door glide effortlessly along the track. If the wheels are damaged or worn, they can cause the door to derailing, wobbling, or become difficult to operate. Common signs that indicate the need for wheel replacement include
- The door is difficult to slide open or closed. - The door jumps off the track during operation. - Visible wear or damage to the wheels.
Tools and Materials Needed
Before you start the replacement process, gather the necessary tools and materials
- Replacement wheels (ensure they are compatible with your door model) - Screwdriver (Phillips or flathead, depending on your door) - Pliers - A utility knife (for cutting any old adhesive if necessary) - Lubricant (such as silicone spray)
Step-by-Step Wheel Replacement Process
Here’s a step-by-step guide to help you replace the wheels effectively
1. Remove the Sliding Screen Door - Begin by carefully lifting the sliding screen door off its track. Tilt the bottom of the door towards you and remove it from the frame. This may require some force if the door is stuck, so be cautious not to damage the frame or door.
wheel replacement for sliding screen door

2. Inspect the Wheel Assembly - Once you have the door off, locate the wheel assembly at the bottom of the door. Depending on your door model, there may be a cover that protects the wheels. Use a screwdriver to remove this cover if necessary.
3. Remove the Old Wheels - Carefully detach the old wheels from the wheel assembly. This may involve unscrewing them or simply pulling them out, depending on the design. Keep an eye on how the wheels are fixed in place, as this will help guide you when installing the new ones.
4. Install the New Wheels - Take your new wheels and fit them into the wheel assembly. Ensure that they are securely attached and rotate freely. If applicable, reattach any covers that were removed during the disassembly process.
5. Reinstall the Sliding Screen Door - Lift the door back onto the track, tilting the bottom first, then pressing the top part into place. Ensure that the wheels are seated properly in the track for smooth operation.
6. Test the Door - After reinstalling the door, test its sliding motion. It should glide smoothly along the track without any obstruction. If it feels stiff or does not slide correctly, double-check the wheel installation and ensure that they are aligned properly.
7. Lubrication - Once satisfied with the door’s operation, apply a silicone-based lubricant to the track. This will not only enhance the door’s performance but also prolong the life of the new wheels by reducing friction.
Preventive Maintenance Tips
To ensure that your sliding screen door functions optimally for years to come, consider the following preventive maintenance tips
- Regularly clean the track to remove dirt and debris that can obstruct the wheels. - Inspect the wheels periodically for any signs of wear or damage. - Lubricate the track every few months to maintain smooth operation.
Conclusion
Replacing the wheels on a sliding screen door is an achievable task that can restore functionality and improve convenience in your home. With a few simple tools and some basic steps, you can have your door gliding smoothly in no time. By being proactive with maintenance, you’ll extend the lifespan of your sliding screen door and enjoy the benefits of fresh air and outdoor views hassle-free. Whether you are a seasoned DIYer or a first-timer, this task can be both rewarding and straightforward. Happy sliding!
-
Window Lock Handle for Security UpgradesNewsJun.20,2025
-
Proper Lubrication Techniques for Sliding Gate WheelsNewsJun.20,2025
-
Ornamental Iron Castings for Interior DesignNewsJun.20,2025
-
Creative Ways to Decorate Around a Cast Iron FireplaceNewsJun.20,2025
-
Cast Iron Pipe and Fitting for Plumbing SystemsNewsJun.20,2025
-
Cast Iron Panel Casting for Architectural ElementsNewsJun.20,2025


