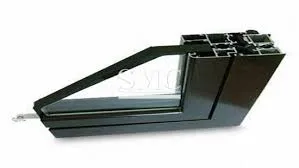
screen door roller replacement
Screen Door Roller Replacement A Comprehensive Guide
Screen doors are a common feature in many homes, providing a barrier against pests while allowing fresh air and light to come in. However, over time, the rollers that help the screen doors slide smoothly can wear out or become damaged, leading to frustration when trying to open or close the door. Fortunately, replacing screen door rollers is a manageable DIY project that can restore functionality to your screen door. In this article, we will guide you through the process of screen door roller replacement.
Understanding Screen Door Rollers
Before diving into the replacement process, it is important to understand what screen door rollers are. Typically, these rollers are small wheels or ball bearing devices located at the bottom of the screen door, allowing it to glide along a track. When these rollers wear out, the door may stick, wobble, or even come off its track entirely. Signs that your screen door rollers might need replacing include difficulty in opening or closing the door, visible wear, or even noise when the door is moved.
Tools You Will Need
To successfully replace your screen door rollers, you'll need a few basic tools
1. Screwdriver Most screen doors will require either a Phillips or flat-head screwdriver. 2. Pliers These can be useful for gripping small parts. 3. Replacement Rollers Make sure to purchase the correct size and type for your specific screen door. 4. Measuring tape To ensure that you get the right size of rollers. 5. Level For ensuring that the door is installed properly.
Step-by-Step Replacement Process
Step 1 Remove the Screen Door
Begin by removing the screen door from its track. This often involves lifting the door upwards to release it from the bottom track and then tilting it towards you. Be cautious during this step to avoid damaging the frame or the door itself.
Step 2 Inspect the Existing Rollers
Once the door is removed, take a good look at the existing rollers. Determine whether they are adjustable or fixed, as this will dictate your next steps. If they are adjustable, you might be able to fine-tune their height instead of replacing them.
screen door roller replacement

Step 3 Remove the Old Rollers
Using your screwdriver, unscrew any screws that are holding the old rollers in place. If the rollers are stuck, you might need to gently pry them out using a flat-head screwdriver or pliers. Be careful not to damage the door while doing this.
Step 4 Install the New Rollers
Take your new rollers and position them where the old ones were removed. Secure them using screws, ensuring they are tightly fastened but not overly tightened, as this could hinder their movement. If the rollers are adjustable, make sure they are set to the proper height.
Step 5 Rehang the Door
With the new rollers installed, it’s time to rehang the screen door. Align the top of the door with the bracket on the frame, lifting the door into position before tilting it down into the bottom track. Ensure that the rollers slide smoothly along the track as you do this.
Step 6 Test the Screen Door
After reinstallation, test the screen door to ensure it opens and closes smoothly. It should glide effortlessly along the track. If there are any issues, check the alignment and height of the rollers, adjusting them as needed.
Maintaining Your New Rollers
To ensure longevity, it's good practice to regularly clean the track and rollers, removing any dirt or debris that may accumulate. Occasional adjustments may also be needed as the door settles or experiences changes in humidity and temperature.
Conclusion
Replacing screen door rollers can significantly improve the function of your screen door, enhancing your home’s ventilation and comfort. With some basic tools and a little bit of time, you can complete this project and enjoy the ease of a well-functioning screen door. Remember, regular maintenance is key to keeping your screen door in top condition, so make it a part of your home care routine!
-
Wrought Iron Components: Timeless Elegance and Structural StrengthNewsJul.28,2025
-
Window Hardware Essentials: Rollers, Handles, and Locking SolutionsNewsJul.28,2025
-
Small Agricultural Processing Machines: Corn Threshers, Cassava Chippers, Grain Peelers & Chaff CuttersNewsJul.28,2025
-
Sliding Rollers: Smooth, Silent, and Built to LastNewsJul.28,2025
-
Cast Iron Stoves: Timeless Heating with Modern EfficiencyNewsJul.28,2025
-
Cast Iron Pipe and Fitting: Durable, Fire-Resistant Solutions for Plumbing and DrainageNewsJul.28,2025
-
 Wrought Iron Components: Timeless Elegance and Structural StrengthJul-28-2025Wrought Iron Components: Timeless Elegance and Structural Strength
 -
 Window Hardware Essentials: Rollers, Handles, and Locking SolutionsJul-28-2025Window Hardware Essentials: Rollers, Handles, and Locking Solutions
 -
 Small Agricultural Processing Machines: Corn Threshers, Cassava Chippers, Grain Peelers & Chaff CuttersJul-28-2025Small Agricultural Processing Machines: Corn Threshers, Cassava Chippers, Grain Peelers & Chaff Cutters


